Getting started
Sign up free at app.exponential.at — or self-host. Your first workspace is created automatically when you sign in.
Create a project
The first-run wizard walks you through it: connect a GitHub account to your workspace — a quick GitHub authorization — then pick the repo, name the project, and choose a short prefix (e.g. EXP) — issues are numbered with it (EXP-1, EXP-2, …). Repo pickers only offer repos from the accounts your workspace has connected; granting access to more repositories happens on GitHub's installation settings page.
Invite members
Open Workspace Settings → Members and generate an invite link. Anyone who follows it joins the workspace.
Issues
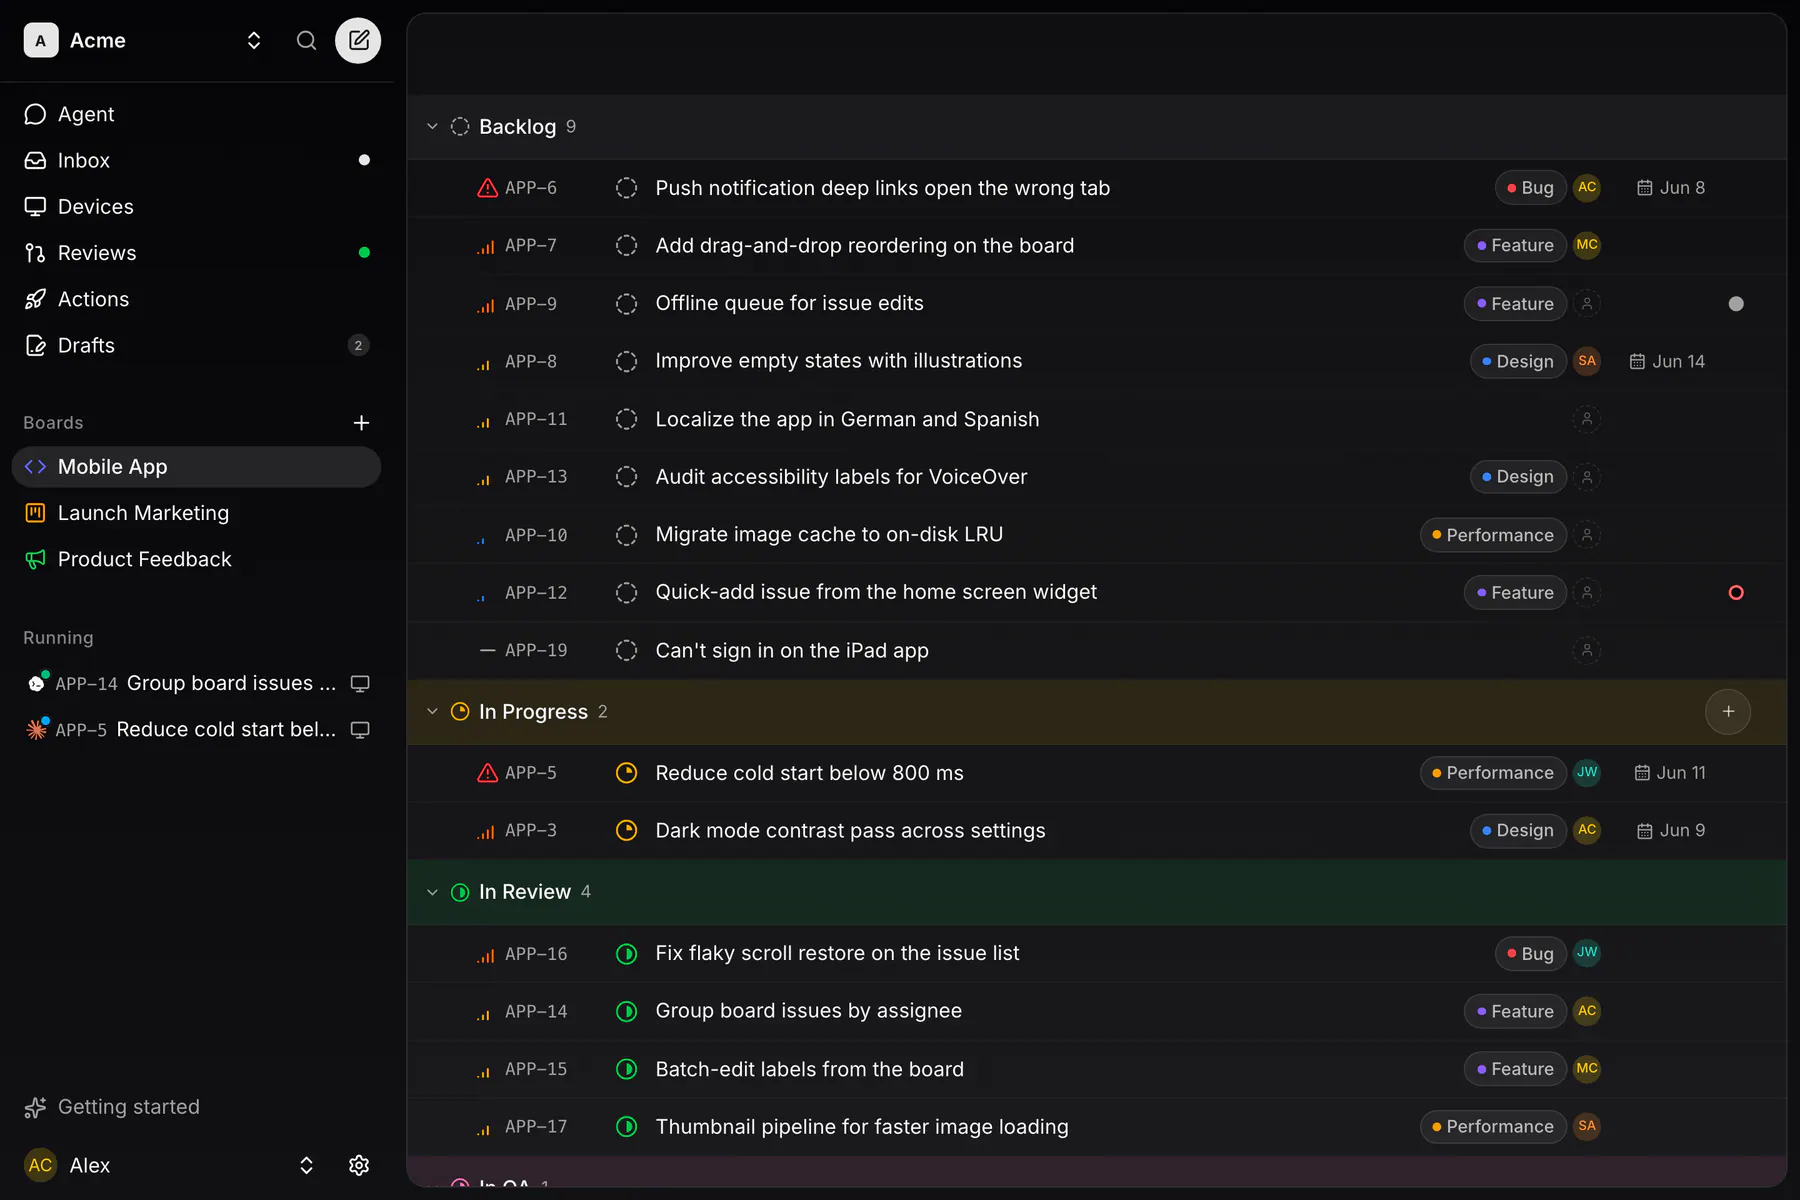
Each issue has a status (Backlog, Todo, In Progress, Done, Cancelled, Duplicate), a priority (Urgent → Low), optional labels, an assignee, and an optional due date. Change any of them inline from the list or the detail view. The filter bar has All Issues / Active / Backlog presets plus a popover for filtering by status, priority, or label.
Markdown descriptions
Descriptions and comments are GitHub-flavored markdown and render identically on web, iOS, Android, and desktop: headings, lists, task lists (- [ ]), code blocks, blockquotes, links, and inline images. Type @ to mention a teammate — they're notified and auto-subscribed to the issue.
Recurring issues
Give an issue a recurrence interval and the next occurrence is created the moment you complete the current one.
One issue, one pull request
An issue that gets coded maps to exactly one branch — exp/<IDENTIFIER> — and one pull request. The PR is linked on the issue and its state (open, merged) is tracked automatically.
Desktop IDE
The native desktop app for macOS and Linux is a full git IDE — and the one client that runs coding sessions. Get it from the download page.
Open a project and its repository clones automatically. Inside: the issue board and issue tabs, a file tree, a source-control panel (stage, commit, push/pull, history, side-by-side diffs), and an embedded terminal.
Sign in with your usual account — app.exponential.at, or your own domain if you self-host.
Start coding
Start coding on any issue hands it to Claude — on your machine, on your Claude subscription. You need git and the claude CLI on your PATH, authenticated. Nothing else.
What happens
- The app creates a git worktree on a fresh
exp/<IDENTIFIER>branch and mints a short-lived GitHub token for the session. - Claude opens in the embedded terminal, seeded with the issue. It proposes a plan first, then implements.
- When done, it commits, pushes, and opens the pull request itself — linked back to the issue.
Stop & steer
It's a real terminal — type into it any time to redirect or answer a question, and hit Stop to end the session. While it runs, the live terminal also streams to your other devices, so you can watch and steer from your phone.
Mobile apps
Native iOS and Android companion apps: triage the board, review issues, and comment on the go — everything syncs in real time. Push notifications cover assignments, comments, mentions, and PR updates. Workspace and project setup happens on web or desktop.
Feedback widget
Embed a feedback button on any website. Visitors report a bug with a screenshot — captured in the browser, annotatable with rectangles, arrows, and freehand lines — and the submission lands as an issue in the project you choose, screenshot attached.
Create a widget in Workspace Settings → Feedback widget (workspace owners only). Each config gets a public expw_ key and a domain allowlist. Then paste the snippet:
<script>
(function (w, d, u) {
if (w.ExponentialWidget) return;
var q = [], api = { q: q };
["init","identify","setCustomData","open","close"].forEach(function (m) {
api[m] = function () { q.push([m, [].slice.call(arguments)]); };
});
w.ExponentialWidget = api;
var s = d.createElement("script");
s.async = true; s.src = u;
d.head.appendChild(s);
})(window, document, "https://app.exponential.at/widget/v1/loader.js");
ExponentialWidget.init({ key: "expw_YOUR_KEY" });
</script>Optionally call ExponentialWidget.identify({email, name}) to attach your signed-in user, and setCustomData({…}) to add context to every submission.
MCP & API
Every instance exposes an MCP server at /api/mcp. Point Claude Code, Cursor, or any MCP-aware tool at it and it can list, create, and edit issues, projects, labels, and comments:
{
"mcpServers": {
"exponential": {
"url": "https://app.exponential.at/api/mcp"
}
}
}Authentication: OAuth for interactive tools (the standard MCP flow), or an API key as a bearer token for headless agents and scripts.